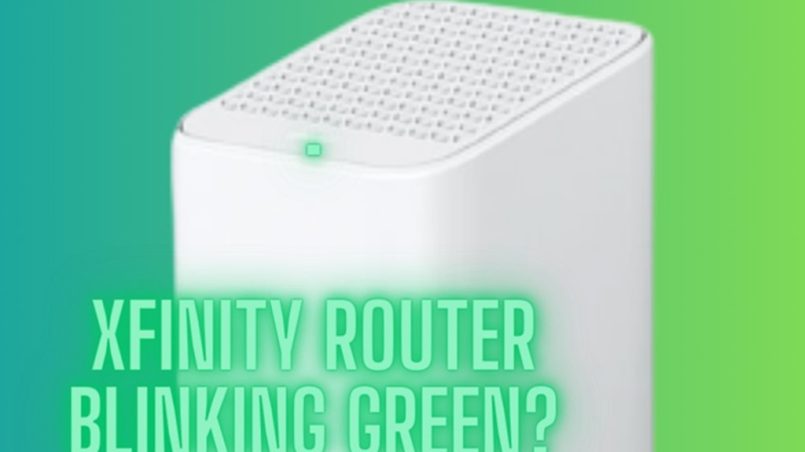
The Xfinity gateway is the centerpiece of Comcast’s home internet service, providing the router and modem functions in a single device. This gateway is designed to be always on, with a front LED panel showing its status. Under normal operation, the LED should show solid green or blue light indicating a proper connection. However, some users encounter issues where the gateway LED starts blinking green.
A blinking green light typically means there is a connection problem between the gateway and Comcast’s network. It could be temporarily losing sync or struggling to fully establish a link. Some common reasons for a blinking gateway include loose cable connections, outdated firmware, interference, or other technical issues.
Troubleshooting Xfinity gateway blinking green can be frustrating, but usually the problem can be corrected with simple steps. Resetting the device, checking connections, updating firmware, and replacing hardware may all help resolve a blinking light. With some focused troubleshooting, you can usually get the gateway back to showing a solid light and maintain a stable internet connection.

Determine If It’s a Normal Blink or Error Blink
The Xfinity gateway blinking green its LED lights during normal operation, but sometimes a blinking pattern can indicate there’s an error that needs troubleshooting. Here’s how to tell the difference:
Normal Blinking
- Solid green light – Gateway is powered on and working normally
- Blinking green light – Downloading or uploading data
- Blinking blue light – Connecting a device to the network
- Alternating green and blue – Both downloading data and connecting a device
This is all standard activity for the gateway. As long as your internet services seem to be working fine, these blinking lights are no cause for concern.
Error Blinking
- Fast blinking green – Can’t connect to the Internet
- Blinking red light – Gateway error has occurred
- Alternating red and green/blue – Critical error such as activation failure
If you notice these patterns, there’s likely a technical issue with the gateway itself or the connection. The next steps will be resetting and troubleshooting to resolve the problem.
Reset the Gateway
One of the easiest troubleshooting steps is to simply reboot the Xfinity gateway. A quick reboot can fix minor software glitches that are causing the light to blink.
Reboot your gateway by following these simple steps:
- Locate the power button on the back or side of the gateway. It may be labeled as Power, On/Off, or have a power icon.
- Press and hold the power button for 10-15 seconds until the gateway turns off.
- Wait about 30 seconds, then press the power button again to turn it back on.
- Give the gateway some time to reboot completely. The lights on the front will blink and change colors during this process.
- Once it has finished rebooting, check to see if the blinking green light has stopped. Often a basic reboot is all that’s needed.
- If the blinking green light returns after rebooting, continue troubleshooting the other potential issues covered in this guide.
- You can also reboot your gateway through the Xfinity app or website. Just look for the “Restart Gateway” option.
Rebooting your Xfinity gateway restarts the software, clears any temporary glitches, and re-establishes the internet connection. Try this first when troubleshooting a blinking green light before moving on to more advanced fixes.
Check Connections and Cables
One of the easiest things you can do to troubleshoot a blinking green light is carefully inspect all of the connections and cables on your Xfinity Gateway. A loose connection or faulty cable could be interrupting the gateway’s ability to send and receive data, causing the blinking green status light.
When checking connections, be sure to:
- Inspect where the coaxial cable connects to the gateway and wall jack. The connections should be tight and the cables undamaged. If either end is loose, tighten them by hand or with a wrench. Try unplugging and reconnecting as well.
- Check that the Ethernet cable from your gateway to computer/router is firmly plugged in at both ends, with undamaged cables. Loose Ethernet cables are a common cause of blinking status lights.
- For a gateway with detachable antennas, verify they are tightly screwed into the gateway. Sometimes they can loosen over time and cause wireless network issues.
- If your Xfinity Gateway has a power cord, ensure it is properly plugged into the gateway and electrical outlet. A slightly loose power cord can cause intermittent power issues.
- Inspect your coaxial cables for any kinks, cracks, exposed wiring or other damage. If the coaxial cable is faulty, it can interfere with the gateway communicating over the cable network. Replace suspect cables.
- Try swapping cables to see if the blinking stops. Use a known good coaxial cable and Ethernet cable to replace any suspect cables. This can determine if the issue is with the cabling rather than the gateway.
Paying close attention to your gateway’s connections and cables is an easy first step in diagnosing a blinking green light. Taking the time to check for loose plugs, faulty cables or other connection issues could provide a quick fix.
Update Firmware
Updating the firmware on your Xfinity gateway is one of the best troubleshooting steps when the Xfinity gateway blinking green. The firmware is the software that runs on the gateway hardware. Keeping it updated ensures you have the latest features, security patches, and bug fixes.
To update the firmware:
- Use a web browser to go to 10.0.0.1. This is the gateway’s Admin Toolbox.
- Log in with your admin username and password. The default is username: admin and password: password.
- Select the “Users” menu option.
- Click on “Update Gateway.”
- The gateway will search for any available firmware updates from Comcast’s server.
- If an update is available, click on “Update Gateway” to start the process.
- The update usually takes 5-10 minutes. Do not power off the gateway during the update.
- When complete, you’ll see a message that the latest firmware is installed.
- Reboot the gateway either from the Admin Toolbox or by unplugging it for 15 seconds.
Updating the firmware ensures you have the latest software installed to operate your gateway optimally. If the blinking green light persists after the update, move on to other troubleshooting steps like factory resetting the device. But updating firmware is a quick, easy fix that often resolves gateway connection and blinking light issues.
Factory Reset Your Xfinity Gateway
A factory reset will restore your Xfinity Gateway to its original factory settings. This should be done as a last resort if you can’t resolve the blinking green light through other troubleshooting.
Here are the step-by-step instructions to factory reset your Xfinity Gateway:
- Use a straightened paper clip, pen, or other similar object to press and hold the reset button on the back of your gateway for up to 15 seconds. The reset button is in a tiny hole next to the power cord.
- Continue holding the button down until the lights on the front of the gateway go out and come back on.
- Release the reset button once the lights turn back on. This initiates the factory reset.
- Wait for the gateway to restart. It can take about 5 minutes for the reset to fully complete.
- Once the gateway has restarted, the lights will turn solid again without any blinking.
- Reconnect your devices and configure your network settings again from scratch as if setting up a new gateway.
A factory reset is a last resort option but can often resolve firmware glitches, inconsistent blinking patterns, and other issues. Just be prepared to set up your gateway and reconnect all devices after completing the reset. Avoid resetting the gateway frequently as it can reduce the lifespan.

Replace Batteries
The Xfinity Gateway has an internal battery backup that keeps it running during short power outages. If the gateway is blinking green, the backup battery may need to be replaced.
The backup battery is designed to last 3-5 years under normal usage. However, high temperatures, frequent power outages, or a faulty battery can shorten its lifespan.
Replacing the backup battery is a quick and easy process that you can do yourself. Here’s a step-by-step guide:
- Order a replacement backup battery online or at your local Xfinity store. You’ll need the specific backup battery made for your model gateway.
- Unplug the power cord from the gateway and wait at least 60 seconds.
- Turn the gateway over to locate the battery compartment cover. Slide the cover off to access the battery.
- Gently remove the old battery from the compartment. Avoid yanking on the connector cable.
- Insert the new battery, making sure the connector cable lies flat in the compartment.
- Slide the battery compartment cover back on until it clicks into place.
- Plug the power cord back into the gateway and wait for it to reboot.
With a fresh backup battery installed, the gateway should stop blinking green during power outages. Keep an eye on the battery light to gauge when it may need replacement again. Properly maintaining the backup battery ensures you won’t lose internet connectivity when you need it most.
Let me know if you would like me to expand or modify this section further. I can provide more details on troubleshooting the old battery or finding replacement batteries.
Contact Support
If you’ve tried all the troubleshooting steps and your Xfinity gateway blinking green, it’s time to contact Xfinity support. Getting help from the experts can save you time and frustration compared to endlessly troubleshooting on your own.
Contact Xfinity support when:
- None of the self-help steps have resolved the blinking green light issue.
- You suspect there is a more serious problem like a faulty gateway or cabling issues.
- You keep losing your internet connection despite resetting and updating the gateway.
- You are unable to access or log into the gateway even after factory resetting.
- You don’t feel technically confident enough to continue troubleshooting yourself.
The Xfinity support team can run remote diagnostics, send a technician if needed, provide warranty service for the gateway, and get your connectivity running smoothly again. Don’t spend hours or days stuck on your own when professional help is available. The right assistance at the right time can get you back up and running quickly.
Replace Gateway
Deciding when to replace your Xfinity gateway can be tricky. Here are a few signs that it may be time to get a new one:
- Your gateway is over 5 years old. Xfinity gateways usually only last 4-6 years before needing replacement. The older it gets, the more likely issues will pop up.
- You are experiencing frequent disconnections or very slow speeds. If you’ve tried all troubleshooting steps and your connectivity is still poor, the gateway itself may be failing. Newer models have faster processors and more radio bandwidth for better WiFi coverage.
- The gateway doesn’t support the latest technologies. Gateways more than 2-3 years old likely don’t support modern features like Wifi 6, OFDMA modulation for faster throughput, or Comcast’s xFi Advanced Security built-in protection. A new model will give you access to the latest performance optimizations.
- Parts of your home have poor WiFi signal strength. If there are WiFi dead zones in your home that you can’t resolve by moving the gateway, a newer model with better antenna design could improve coverage.
- You need more Ethernet ports. Most gateways only have 4-5 LAN ports. If you need more wired connections, some newer models offer built-in switches with 8 or more ports.
- You want advanced customization options. Newer gateways allow robust parental controls, enhanced quality of service, advanced diagnostics, and granular network configuration through apps.
If you are running into any of the situations above, contacting Comcast support about a free gateway upgrade is probably your best bet for improving connectivity and features. Just be aware they may charge you a fee if the gateway is damaged. Overall though, getting a replacement gateway every 4-5 years is recommended to keep up with the latest technology.
Conclusion
A blinking green light on your Xfinity Gateway is usually an indication of a connection issue or other error. A normal intermittent blink shows the gateway is functioning properly, while a constant or irregular blink typically means there’s a problem needing troubleshooting.
The first steps are verifying the blink pattern, resetting the gateway, and checking your cables and connections. Updating the firmware, factory resetting, or replacing the backup battery can also resolve many blinking light issues. Contacting Xfinity Support provides further assistance if needed, and they may ultimately suggest replacing an older or defective gateway.
With some basic Xfinity gateway blinking green troubleshooting steps, you can often resolve a bothersome blinking gateway on your own. The key is carefully observing the blink pattern and systematically trying solutions until normal operation is restored. Persistent blinking that resists troubleshooting does indicate a gateway replacement may be required.
Overall, don’t ignore a constant or irregular green blink—it’s your gateway’s way of signaling a problem. In the realm of remote computer control, explore how to effortlessly manage your computer from a distance with these free TeamViewer alternatives, ensuring a seamless internet experience by following these tips to address any connectivity issues on your home network.

